iOS视频直播---主要的概念(一)
第一部分: 视频采集----AVCaptureSession
1.1 视频采集的流程
AVCaptureSession通过把设备的麦克风/摄像头(AVCaptureDevice)实例化成数据流输入对象(AVCaptureDeviceInput)后,再通过建立连接(AVCaptionConnection)将录制数据通过数据流输出对象(AVCaptureOutput)导出,而录制的时候咱们可以同步预览当前的录制界面(AVCaptureVideoPreviewLayer).
1.2 视频采集中的主要对象
1. AVCaptureSession: 是设备音频/视频整个录制期间的管理者;2. AVCaptureDevice: 设备管理者: 操作闪光灯,手电筒,聚焦模式等;3. AVCaptureDeviceInput: 是录制期间输入流数据的管理对象;4. AVCaptionConnection: 是将 输入流/输出流 连接起来的连接对象,视频/音频稳定,预览与录制方向一致 都在这里设置,还有audioChannels声道;5. AVCaptureOutput: 是 输出流数据 的管理对象,通过头文件可以看到有很多子类,而我们通常也使用其子类;6. AVCaptureVideoPreviewLayer: 是一个CALyer,可以让我们预览拍摄过程中的图像.
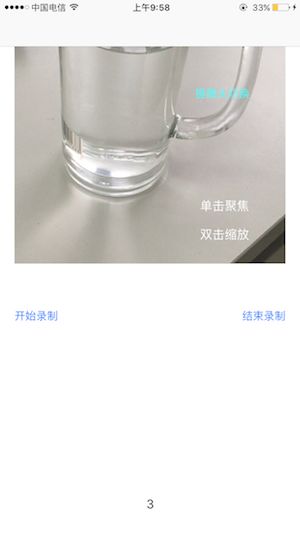
本文最终实现目标---音视频采集/压缩:

Paste_Image.png
1.3 设备授权
录制视频需真机, 因此必须首先获得授权;用以下代码来判断, 返回结果为枚举值;
//此处获取摄像头授权, 是一个枚举值[AVCaptureDevice authorizationStatusForMediaType:AVMediaTypeVideo]枚举值---AVAuthorizationStatus为:
typedef NS_ENUM(NSInteger, AVAuthorizationStatus) {  //未进行授权选择
    AVAuthorizationStatusNotDetermined = 0,    //未授权,且用户无法更新,如家长控制情况下
    AVAuthorizationStatusRestricted,    //用户拒绝App使用
    AVAuthorizationStatusDenied,    //已授权,可使用
    AVAuthorizationStatusAuthorized} NS_AVAILABLE_IOS(7_0) __TVOS_PROHIBITED;
1.4 AVCaptureSession对象创建
- (void)initAVCapture{

    _captureSession = [[AVCaptureSession alloc] init];    //设置录像的分辨率
    if ([_captureSession canSetSessionPreset:AVCaptureSessionPresetHigh]) {
        [_captureSession canSetSessionPreset:AVCaptureSessionPresetHigh];
    }
    /****************************/
        [_captureSession beginConfiguration];    /*-----------------------------*/
    //摄像头<枚举值:前后>
    _videoDevice = [self deviceWithMediaType:AVMediaTypeVideo preferringPosition:AVCaptureDevicePositionBack];    //视频的输入输出
    [self videoIO];    //音频的输入<录制视频时不需要输出>
    [self audioIO];    //录制的同时播放
    [self previewLayer];    /*-----------------------------*/
    [_captureSession commitConfiguration];    //开启会话-->注意,不等于开始录制
    [_captureSession startRunning];
}
注释:
**1. [_captureSession beginConfiguration/commitConfiguration];
**参考苹果官方文档中所述:
After calling beginConfiguration, you can for example add or remove outputs, alter
 the sessionPreset, or configure individual capture input or output properties. No changes
are actually made until you invoke commitConfiguration(), at which time they are applied together.
1.5 视频的输入和输出--AVCaptureDeviceInput/AVCaptureMovieFileOutput
//视频的输入和输出- (void)videoIO{{    /*---------------input-------------------------*/
    NSError *videoError;    // 视频输入对象
    // 根据输入设备初始化输入对象,用户获取输入数据
    _videoInput = [[AVCaptureDeviceInput alloc] initWithDevice:_videoDevice error:&videoError];    if (videoError) {        NSLog(@"---- 取得摄像头设备时出错 ------ %@",videoError);        return;
    }    // 将视频输入对象添加到会话 (AVCaptureSession) 中
    if ([_captureSession canAddInput:_videoInput]) {
        [_captureSession addInput:_videoInput];
    }
    /*---------------output------------------------*/
    // 拍摄视频输出对象
    // 初始化输出设备对象,用户获取输出数据
    _movieOutput = [[AVCaptureMovieFileOutput alloc] init];
    if ([_captureSession canAddOutput:_movieOutput]) {
        [_captureSession addOutput:_movieOutput];        AVCaptureConnection *captureConnection = [_movieOutput connectionWithMediaType:AVMediaTypeVideo];        // 视频稳定设置
        if ([captureConnection isVideoStabilizationSupported]) {
            captureConnection.preferredVideoStabilizationMode = AVCaptureVideoStabilizationModeAuto;
        }
        captureConnection.videoScaleAndCropFactor = captureConnection.videoMaxScaleAndCropFactor;
    }
}
1.6 音频的输入---AVCaptureDeviceInput
#pragma mark 音频的输入输出- (void)audioIO{    /*-------------input---------*/
    NSError *audioError;    // 添加一个音频输入设备
    _audioDevice = [AVCaptureDevice defaultDeviceWithMediaType:AVMediaTypeAudio];    //  音频输入对象
    _audioInput = [[AVCaptureDeviceInput alloc] initWithDevice:_audioDevice error:&audioError];    if (audioError) {        NSLog(@"取得录音设备时出错 ------ %@",audioError);        return;
    }    // 将音频输入对象添加到会话 (AVCaptureSession) 中
    if ([_captureSession canAddInput:_audioInput]) {
        [_captureSession addInput:_audioInput];
    }
}
1.7 展示的录制视频
- (void)previewLayer{
    [self.view layoutIfNeeded];
    // 通过会话 (AVCaptureSession) 创建预览层
    _captureVideoPreviewLayer = [[AVCaptureVideoPreviewLayer alloc] initWithSession:_captureSession];
    _captureVideoPreviewLayer.frame = self.view.layer.bounds;    //有时候需要拍摄完整屏幕大小的时候可以修改这个
    //    _captureVideoPreviewLayer.videoGravity = AVLayerVideoGravityResizeAspectFill;
    // 如果预览图层和视频方向不一致,可以修改这个
    _captureVideoPreviewLayer.connection.videoOrientation = [_movieOutput connectionWithMediaType:AVMediaTypeVideo].videoOrientation;
    _captureVideoPreviewLayer.position = CGPointMake(self.videoView.frame.size.width*0.5,self.videoView.frame.size.height*0.5);
    // 显示在视图表面的图层
    CALayer *layer = self.videoView.layer;
    layer.masksToBounds = true;
    [self.view layoutIfNeeded];
    [layer addSublayer:_captureVideoPreviewLayer];

}
第二部分
视频压缩
1.1需要引入系统框架--AssetsLibrary.framework与AVKit.framework
# 压缩视频- (IBAction)compressVideo:(id)sender{    NSLog(@"开始压缩,压缩前大小 %f MB",[self fileSize:self.videoUrl]);
    self.saveBtn.enabled = NO;
    AVURLAsset *avAsset = [[AVURLAsset alloc] initWithURL:self.videoUrl options:nil];    NSArray *compatiblePresets = [AVAssetExportSession exportPresetsCompatibleWithAsset:avAsset];    if ([compatiblePresets containsObject:AVAssetExportPresetLowQuality]) {
        AVAssetExportSession *exportSession = [[AVAssetExportSession alloc] initWithAsset:avAsset presetName:AVAssetExportPreset640x480];
        exportSession.outputURL = [self compressedURL];        //优化网络
        exportSession.shouldOptimizeForNetworkUse = true;        //转换后的格式
        exportSession.outputFileType = AVFileTypeMPEG4;        //异步导出
        [exportSession exportAsynchronouslyWithCompletionHandler:^{            // 如果导出的状态为完成
            if ([exportSession status] == AVAssetExportSessionStatusCompleted) {                NSLog(@"压缩完毕,压缩后大小 %f MB",[self fileSize:[self compressedURL]]);
                [self saveVideo:[self compressedURL]];
            }else{                NSLog(@"当前压缩进度:%f",exportSession.progress);
            }
            self.saveBtn.enabled = YES;
        }];
    }
}
压缩是使用的AVURLAsset的流程图如下:

Paste_Image.png
2.保存暂时使用的是ALAssetsLibrary;
ALAssetsLibrary提供了我们对iOS设备中的相片、视频的访问。
//ALAssetsLibrary提供了我们对iOS设备中的相片、视频的访问。- (void)saveVideo:(NSURL *)outputFileURL
{
    ALAssetsLibrary *library = [[ALAssetsLibrary alloc] init];
    [library writeVideoAtPathToSavedPhotosAlbum:outputFileURL
                                completionBlock:^(NSURL *assetURL, NSError *error) {                                    if (error) {                                        NSLog(@"保存视频失败:%@",error);
                                    } else {                                        NSLog(@"保存视频到相册成功");
                                    }
                                }];
}
注释
PhotoKit是苹果推出的用于替代ALAssetsLibrary的框架。
PhotoKit为使用照片和视频资源提供了新的API。PhotoKit还包含一个线程安全架构用以获取、缓存缩略图和全尺寸图片,请求资产更改,遵守其他应用所做的变化,以及对资产内容进行可恢复的编辑。
Demo详见github
https://github.com/mugworts/iOSLive

注意:本文归作者所有,未经作者允许,不得转载
